A gold star to you momma for choosing the best maternity, newborn & family photographer! Um but, now what? What do you do with that disc full of digital images, or you those 8×10 prints and even a large canvas that you chose??? Get those cherished family photos off of aging media like disks & USBs and up on the walls where you can appreciate them every single day as the photo display wall of your dreams.
As you might have guessed, I take so many pictures of my family as we grow and was very intimidated at how to actually display and arrange all these precious memories in my own home achieving the modern, magazine-quality look; not a hot mess. Because we’re a military family and move often, I get the *gulp* pleasure of designing and redesigning my photo display walls and would like to share my experience with ya’ll saving you the headaches and/or swearing that come with “big projects”.
YOU WITH ME???
Selection: A Starting Point for Your Dream Photo Display Wall
- First, pick your spot in a common area like dining room or along staircases and take into account furniture. You can place them on low tables or mantles and incorporated into the wall display
- If you choose the go-to above the sofa spot, don’t hang them too high so they feel disconnected & floating; instead leave 3-6 inches from the top of the couch to the bottom of your display
- Then, select your photos that mean the most to you, evoke raw emotion, or tell your unique family story (narrow down from there depending on space)
- Keep in mind, you can mix and match print sizes and even canvas, or home decor signs all mixed together artfully
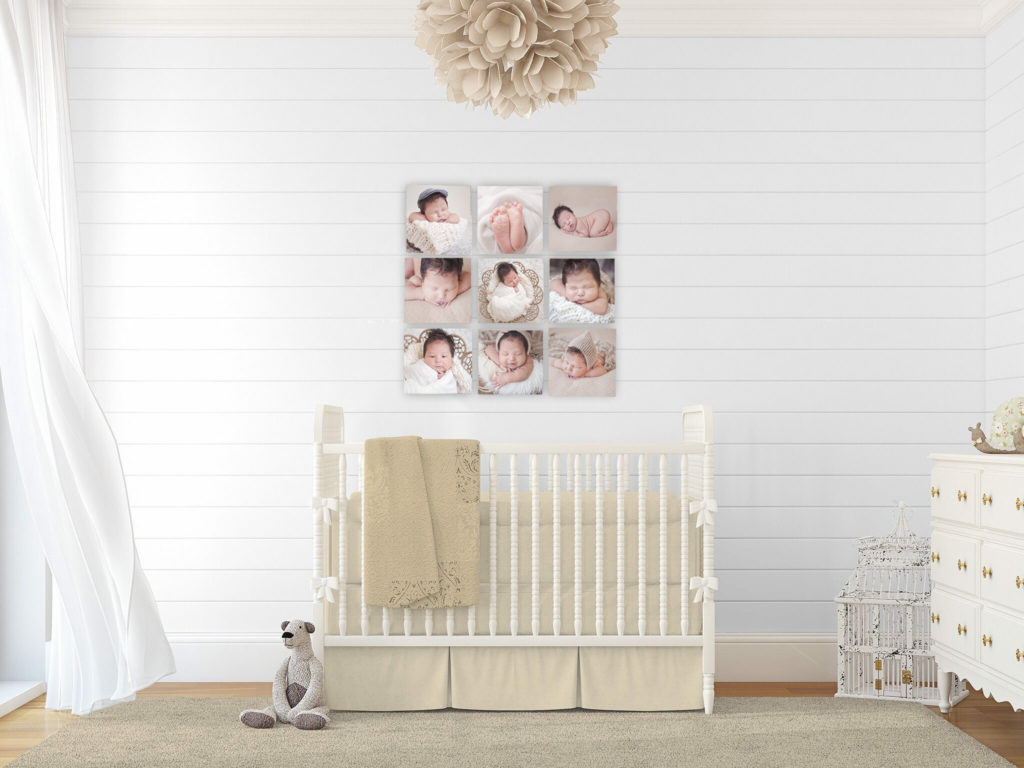
- Quick tip: Short on space? Choose a few collage or multi-picture frames
- Choose matching canvas/frame sizes & colors, and think about displaying all photos in black & white to make a cohesive, polished, powerful design statement
- Your PHOTOS should be the star not overwhelmed or upstaged by your frame choices
- Be sure you have a clear idea of the actual spot & overall look you’re desiring: modern, homey, classic, whimsical, artistic, or if you want to tell a story through chronological arrangement
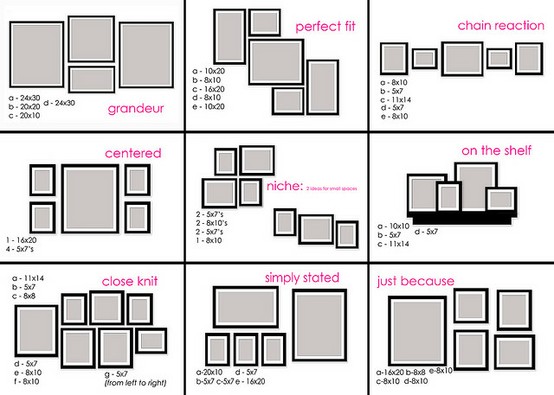
Choosing Your Ideal Display Arrangement
- Before even putting up nails, arrange all your frames & canvases on the floor first from center of display outwards. Tweak, rearrange & expand the layout until it’s exactly what you want
- Begin with a chosen focal point and build around that leaving room to add more later if you’d like- like choosing a simple diamond or rectangular shaped arrangement for a balanced look
- Center your photo display wall at eye level (about 5 and a half feet from the floor- or higher if you have vaulted ceilings or a tall family)
- Be sure to keep groupings relatively tight, about 1-2 inches apart maximum
- Lastly, you may be the type to benefit from the paper outline approach where you hang paper replicas of your frames/canvases to visualize it differently UP on the wall itself
- Renting & want to minimize holes in the wall? Simply install a photo ledge or two where you can overlap frames of varying heights and stagger there depths to create more interest
.jpg)
.jpg)
See Your Display: Hanging Your Photos on the Wall
- How do you hang them straight and get the tops lined up??? Definitely THE hardest part.
- Use a string stretched between to tacks as your guide, the tried-and-true method
- Make sure each frame is level before hanging the next one by using a level or your iPhone level feature
- Most important tip if you get nothing else from this… for best results and overall sanity DO NOT try this alone. Have a buddy to help on perspective as it takes shape and to help keep things level.
Tips from the Experts: Pottery Barn
Still not convinced? Here’s an excellent Pottery Barn Article whose design experts recommend ways to draw the eye to your display focal point and unifying your overall layout for maximum wow factor!